Tuesday, 3 May 2011

lord of avernus hero guide

Abaddon, Lord of Avernus Guide

Written by admin on September 26th, 2008
A former paladin of great renown, Abaddon fell into darkness during the invasion of the Burning Legion, becoming possessed by many demons, corrupting both his soul and his powers. Now a Death Knight set high in the Lich King’s hierarchy of generals, he rides into battle against impossible odds, never stopping until he reaches the World Tree itself. Whether enhancing his own fortitude with a shield of dark energy, or using his life force to aid in combat, the Lord of Avernus leads the armies of the Scourge ever onward, forever locked in combat with the forces of good, and his enemies who were once his greatest comrades.
Abadon is a most difficult hero to kill in DotA Allstars, thanks to his Aphotic Shield and Borrowed Time. While he can easily be made into a tank, his role is often that of a support hero, as all three of his basic skills benefit his allies while his ultimate allows him to survive in team fights.

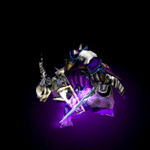
I recommend you to play Abaddon if you

  • Want to play an unstoppable pusher and support hero with almost infinite health and mana
  • Want to be the core hero in pushes with infinite shields and heals
  • Want to never die (almost)
  • Love to play in pusher tactics and want a hero who cannot be stopped
  • Love to play a support role
I do not recommend you to play Abaddon if you
  • Prefer hour-long games instead of fast and crucial ones
  • Above everything hate to play support heroes
  • Want all the kills for yourself instead of being the one who helps getting and securing themIf this sounds interesting, please continue reading.
Now let’s have a closer look on Abaddon’s pros/cons, stats and abilities.

Pros
  • Has a strong nuke that also also works as a heal
  • Has an ultimate that makes him invincible which will activate itself, even through silences and stuns
  • Has a strong shield that does not only neglect incoming damage but absorbs it and blasts it at its enemies
  • Can remove many negative buffs through his abilities
  • Is devastating during the early game and middle game
  • Can deny himself
  • Has both strong pushing and support capabilities
Cons
  • Becomes considerably weaker towards the late game
  • Depends much on his allies and the way his team chooses to playStats
Hero Stats
Strength – 23 + 2,7
Agility – 17 + 1,5
Intelligence – 21 + 2,0
Attack range of 100.
Movement speed of 295.
Level 1 information:
- Health: 587
- Mana: 273
- Damage: 55-65
- Armor: 4
- Attack Speed: 1,45 sec
Level 25 information (without any worn items):
- Health: 2183
- Mana: 1157
- Damage: 119-129 +20
- Armor: 9 +2,8
- Attack Speed: 0,98 sec.
Abilities
Death Coil

A coil of death that can damage an enemy unit or heal a friendly unit at the cost of his own life.
Level 1 – Heals or Damages for 100 HP. Deals 50 HP to himself.
Level 2 – Heals or Damages for 150 HP. Deals 75 HP to himself.
Level 3 – Heals or Damages for 200 HP. Deals 100 HP to himself.
Level 4 – Heals or Damages for 250 HP. Deals 125 HP to himself.
Cooldown: 7 seconds.
Mana cost: 75.
Comment: This is Abaddon’s main nuke or heal. As the description says, it damages or heals enemies or allies for 250 damage at level 4, which is a fair amount, but it also damages yourself. However, this is not a bad thing. The damage dealt on you is fairly low and it can be used for a lot of things, which I will describe later in the guide.
Useful information: Death Coil can be used to deny yourself if you’re below 125 health. It’s not always easy, but if timed correctly, if you see you’re gonna die, killing yourself with Death Coil can be very effective.
Aphotic Shield

Summons dark energies around an ally unit, creating a shield that absorbs a set amount of damage before expiring. When the shield is destroyed it will deal damage equal to the amount it absorbed to an area around it. If cast on self while using borrowed time, the damage you take will heal you. Removes certain types of negative buffs on cast. Lasts 20 seconds.
Level 1 – 125 damage.
Level 2 – 175 damage.
Level 3 – 225 damage.
Level 4 – 275 damage.
Cooldown: 23 seconds.
Mana cost: 100.
Comment: The Aphotic Shield is an incredible strong ability. Not only does it protect either you or one of your allies from taking damage. It also blasts the absorbed damage back on the enemies around the target that wears it. Furthermore it removes most debuffs on cast which means if you’re affected by slows or whatsoever, the shield will negate them. Finally it also works as a heal on yourself if you, as described, cast it on you and take damage while Borrowed Time is activate. This shield is extremely strong and very useful in many situations.
Useful information: The shield’s absorbable damage equals to the damage it deals and vice versa. At level 4 it absorbs 275 damage. Once absorbed, it blasts nearby enemies for 275 damage. Also please note that the shield only blasts visible enemies. Invisible units or units in the fog will not take damage regardless of their distance to you. Also, while shielding when activating Borrowed Time, the shield can still explode thus making it able to heal for 275 damage max.
Frostmourne (Passive)

Abaddon strickens an enemy with Frostmourne’s chilling power on each attack, causing all units who attack the slowed enemy to gain 10% increased movement speed, along with faster attack speed, for a limited time.
Level 1 – 10% increased attack speed, slows enemy by 5%.
Level 2 – 20% increased attack speed, slows enemy by 10%.
Level 3 – 30% increased attack speed, slows enemy by 15%.
Level 4 – 40% increased attack speed, slows enemy by 20%.
Cooldown: None.
Mana cost: None.
Comment: This passive applied-on-attack buff/debuff is fine, but it’s nothing to brag about. It’s fine for increasing your enemies’ attack speed and it’s fairly good for chasing heroes, but during team fights, constantly hitting the enemies can be difficult and dangerous. When you gank with your teammates, this ability is fine but constantly attacking during heated battles is mostly stupid thus making this ability slightly questionable.
Useful information: This ability slows your enemies’ movement and attack speed as well as increasing yours and your allies who attack the target. Once attacked, both the buff and debuff last about 5 seconds, so you have plenty of time to hit, catch up and hit again.
Borrowed Time (Ultimate)

When activated, most negative buffs will be removed and you will no longer take damage for the duration of the ability. If the ability is not in cooldown, it will passively activate when your hitpoints drop below 400.
Level 1 – Lasts 3 seconds.
Level 2 – Lasts 4 seconds.
Level 3 – Lasts 5 seconds.
Cooldown: 45 seconds.
Mana cost: None.
Comment: This is Abaddon’s invincibility cloak. Once activated, you’re completely immune to taking damage. This makes Abaddon extremely hard to kill, especially during the early game and huge team fights. Focusing Abaddon makes it very tough and you will save yourself from so many deaths with the help of this spell. As a bonus, it’s activating itself if you take damage below 400 health, even through silences and Doom. Like the Aphotic Shield it also removes negative buffs. GG?
Useful information: As said this removes most negative buffs like stuns, disables, slows and Doom. It activates itself if you go below 400 health but you can still activate it yourself by manually clicking it. If activated with Aphotic Shield, you will heal for the amount of damage taken during such situation. As a negative side though, Borrowed Time doesn’t make you invulnerable meaning that after activated you can still be stunned, slowed etc. It removes negative buffs on cast but further debuffs can be casted without being cancelled after activation.
Skill order
Level 1 – Aphotic Shield
Level 2 – Death Coil
Level 3 – Aphotic Shield
Level 4 – Death Coil
Level 5 – Aphotic Shield
Level 6 – Borrowed Time
Level 7 – Aphotic Shield
Level 8 – Death Coil
Level 9 – Death Coil
Level 10 – Frostmourne
Level 11 – Borrowed Time
Level 12 – Frostmourne
Level 13 – Frostmourne
Level 14 – Frostmourne
Level 15 – Stats
Level 16 – Borrowed Time
Level 17-25 – Stats
Skills explanation
Death Coil and Aphotic Shield are both your two primary nukes and supports and should be skilled right away. Aphotic Shield will be skilled over Death Coil because it directly helps protecting you or your allies more than Death Coil would do. Also, Aphotic Shield will work as your main harass ability during the first minutes of the game. Borrowed Time is too valuable to be skipped so we skill it when we can in order to survive ganks and tough attacks. Finally, Frostmourne is taken over stats because the buffs and debuffs after all are pretty useful, especially when ganking and chasing. The stats are fine but aren’t super important on Abaddon.
Item order
The cookie cutter supporter
I tend to use this item build in 90 % of all my games. This is fully and utterly based on supporting and is meant to boost your allies with heals, shields, endless mana and different stuffs like disables and Necronomicon for higher pushing capability. This build should be bought if none of your teammates are making a Mekansm. If your teammates do make a Mekansm you ought to follow the second build a few lines beneath this.
Core item build

Basically, with a Mekansm and Arcane Ring in your hand, you will never run out of either mana or health during the early and middle game on a decent team. You will be able to heal, shield and support with mana for almost an infinite duration. Because you’re a support hero, there’s no questioning that either of these items should be bought. However, Arcane Ring should be replaced by a Vladmir’s Offering if and only if someone else on your team already makes an Arcane Ring. There’s not much point in having two thus allowing you to use your Ring of Basilius to complete the Vladmir’s Offering. If you are buying the Arcane Ring you ought to disassemble the Ring of Basilius and keep the Sobi Mask for continious regeneration in despite of the Arcane Ring. Either way, the Ring of Basilius ought to be bought from start to support your’s and your allie’s mana regeneration which allows you to spam your abilities more often.
Items afterwards

After Mekansm and Arcane Ring have been completed, you should start completeing a full levelled Necronomicon. Not only is the Mana Burn nice, the demons also provide True Sight and a great aura for you and your pusher team. The faster you can finish this book, the more effective will your allies be. Boots of Travel are bought mainly for the teleportation because this makes you able to move forth and back on the map much easier, which again makes it easier to start and join pushes as well as getting back from them. Finally, either Eul’s Scepter of Divinity or Guinsoo’s Scythe of Vyse should be bought, On 95% of the time you should choose the Tornado wand over the Sheepstick, but when you at rare occasions have so much money that you can easily afford it, buy Guinsoo’s Scythe of Vyse because it’s a better disable than Eul’s Scepter of Divinity.
The secondary supporter
This build should be followed if your teammates already build a Mekansm before you. If none of them are making a Mekansm, you ought to follow the cookie cutter supporter build above. This build still focuses on support but in an alternative way. Someone already makes a Mekansm so it means you’ll have to buy other items in order to maximize your support potential.
Core item build

The Boots of Speed are self-explanatory. Arcane Ring should be bought if you noone else is making it in order to support with mana in pushes for you and your allies. If someone else makes it though you ought to complete the Vladmir’s Offering instead. Like before though, the Ring of Basilius should be bought from start to give you and your allie some cheap mana regeneration for laning in order to spam your heal/nuke and shield better.
In this core item build the Necronomicon has taken Mekansm’s place as the main item. When you’re not building Mekansm it means you “save” almost 2500 gold which should go directly to a Necronomicon rush. The faster you build it, the more effective it’ll be. Rushing it early will often result in much stronger and more constist pushes.
Items afterwards

Guinsoo’s Scythe of Vyse or Eul’s Scepter of Divinity should be made to get an extra disable for you and your team. Basically, Guinsoo’s Scythe of Vyse is better than Eul’s Scepter both in term of stats and the active disable spell because it allows you to hit the target. However, if you’re not farming very well you ought to buy the Eul’s Scepter of Divinity instead because it’s much cheaper. Finally, Shiva’s Guard should be bought in order to increase your pushing potential as much as possible by giving you the aoe blast and the armor penalty from the item itself.
Optional items

Shiva’s Guard is fine because it gives you an additional aoe nuke which helps you taking down enemies and push better. It also provides acceptable stats and a fine debuff when used. After all, Abaddon in the heat of the combat allowing him to get off a good nova.

Orchid Malevolence is an excellent item. It comes with easy, cheap and purchaseable pieces and its silence is great against many heroes, especially enemies with aoe stuns or escape mechanisms as Blink or Wind Walk.

Helm of the Dominator may be useful in some rare occassions. It allows you to take over a creep who will hopefully boost you and your team with a great aura and perhaps even some abilities (Ensnare or War Stomp for example). However, the two prefered creeps would be a Centaur Khan (Endurance Aura) or a Alpha Wolf (Command Aura).

As a support hero, an animal courier can easily be purchased if your team needs it. In public games, animal couriers are mostly only used by the purchaser but in organized games where teams mostly cooperate, an animal courier is almost unnegligent and Abaddon can easily buy one from the start and even upgrade it to a crow later if needed.

Again, support heroes often buy wards which is again mostly for organized teams. Abaddon is no exception and Abaddon as a ward purchaser is not at all a bad choice.

Personally I consider Radiance a very, very, alternate optional item. It’s expensive and could do much better in the hand of your teammates, however, if noone buys it and if they instead buy like all the other items you need (Mekansm, Necronomicon, Arcane Ring, Shiva’s Guard) and you have a lot of spare money which you can’t just spend on wards or chickens, I guess a Radiance is okay because it helps you clear and push lanes better as well as giving you some weak carry potential which lay some focus upon you from your enemies. Your shield and ultimate will hopefully help you against this.
What if someone builds all the items I want to get like an Arcane Ring, Mekansm, Necronomicon and Vladmir’s Offering?
My suggestion is that you try to replace as many items you can with items from the optional items list. Besides, firstly it almost never happens that someone builds like all the items you wanted to get. Secondly some items can be bought from more heroes like Guinsoo’s Scythe of Vyse or Eul’s Scepter of Divinity.
Items not to buy:
Monkey King Bar, Buriza-do Kyanon, Stygian Desolator, Battle Fury, Divine Rapier and Armlet of Mordiggian are not recommended. Abaddon is, accoarding to this guide, a support hero and should not be built with pure damage items. Abaddon has much more potential as a supporter than a damage dealer.
Cranium Basher and Sange and Yasha are not recommended. Running around hitting lose on enemies and ganking and chasing on your own is definatly not your job. These items don’t support your role in any way and should not be considered on Abaddon.
How to play
Early game
When you’ve picked, started with buying a Sobi Mask and, depending on the game mode, 1-2 Ironwood Branches and a Ring of Regeneration if possible. If you’re playing on a pre-prepared team, you can be content with a Sobi Mask and then buy an Animal Courier. After this, head off to a lane. Try to lane with someone instead of going solo. Especially a hero who benefits a lot from a babysitter is a good lane partner. As soon as you get into your lanes, you should start spamming Aphotic Shield on that creep of yours that take damage. Make sure you time it perfectly so you don’t miss too many blasts (read later in this guide for more tips). Also try not to burn your mana too fast by spamming the shield too much. A good rule of thumb is to save about 150 mana ready to either get a kill or get away. If you’re against a very strong lane, however, you ought to play very passive and save your shield and heal for yourself and your allie instead of spamming them as offensives.
The important thing for you to do during the early game is to secure the lane for you and your allie, either by playing offensive by harassing with Aphotic Shield or by playing defensive against tough opponents by countering the threat with the shield and heal. The better you’re doing, the more free farm you’ll get. Still, always try to spam your shield just enough to harass your opponents but still save enough mana to either rush in or escape. Ganking and roaming is not your cup of tea and is not adviced.
Keep going like this and eventually try to push down your enemies’ tower if get the chance. The faster, the better. Try to not run back too much from start. Stay in your lane and help your allie and yourself. Farm as much as possible from the beginning because you’re most likely not to farm very much later, and if you get your Arcane Ring and Mekansm fast you can push very early which is basically the point of a support and pusher Abaddon.
Middle game
Hopefully you and your team will now start to push harder. You should have finished your Mekansm and/or Arcane Ring by now which means almost endless supports with shields and heals thus making you able to stay in the push much longer. If you didn’t already, try to finish the last outer towers in each lane (the first ones you can kill), but after those you ought to focus the push on one lane. Focusing your pushes on multiple lanes weakens every lane’s pushing force significantly thus lengthens the time before you destroy one lane. The longer the game lasts, the harder it’ll get for you to do something. Therefore, try to focus on one lane where the middle is typically the chosen one because it’s the shortest, but it doesn’t really matter. In pushes you ought to heal, shield and supply mana as much as possible. During this stage of the game you are still very strong and hard to kill so you can easily tank some damage, but be careful not to overdo it. However, your shields ought not to be thrown on yourself unless you’re being focused badly. You’re not meant to be the actual tank on the team, so try to find the hero who has that role and shield him, or atleast reckon the hero on your team your enemies try to focus and defend him. Either way, throwing shields on yourself all the time is a waste since you’re not the tank but a support. You also have your ultimate to get out of tight situations. Try to stay in the front of the combats but without taking too much damage either. If you have it, don’t forget to use your Necronomicon either, especially not if you’re up against invisible heroes.
The middle game is your strongest stage so utilize it as much as possible. Try to push as much as you can. Stay in the push as long as possible by healing with Death Coil and Mekansm, defending with Aphotic Shield and supplying mana with Arcane Ring. If you can get a whole lane including rax down before 30 minutes you are doing good. This is also a very team dependant stage of the game, so try to make them follow you and protect them with your life.
Late game
If you’re in the late game and especially without having done anything crucial to their lanes, you’re not doing very well. By this time you ought to have taken at least a few base towers or a whole lane or else you will be getting a hard time. Your heals, mana and shields are still okay but are getting rather weak and insignificant. Many late gamers will begin to cut through your shield like a knife through hot butter. Your heals and mana support will also begin to turn trivial when they’re nullified with one or two hits. Your goal, however, is still the same as the middle game. Supporting. But you can not longer really participate in the combats as a crucial force. You can’t really tank the niffy late gamers. You can’t deal damage either. You can only hope that your own team is strong enough to tip the bowl to your advantage and still be able to withstand and outpush the hostile forces. Unlike before though, you ought to stay more in the back and throw shields and heals whereas the Arcane Ring is not quite as important as earlier, but may still come in handy from time to time.
How to dominate the battlefield with Aphotic Shield
To sum up, Aphotic Shield works as a shield, a nuke and a self-heal ability. It absorbs 300 damage at level 3 and once it has absorbed it, it will break and blast nearby enemies around the shielded target. The aoe is rather large but it doesn’t hit invisible units nor units in the fog (in other words, units you do not have sight of). If the shield doesn’t absorb its max damage (e.g. 300) it will not explode but eventually disappear. Anyway, the shield has 3 uses:
Nuke
Defense
Heal (self)Using the shield as a nuke
Basically, the shield is mainly used for harassing and killing heroes during the early game. When you’re in your lane, you’re supposed to throw the shield and make it blast in order to damage your enemies. However, enemies with just a little experience know that the shield will explode thus trying to get away or out of sight in time. This means you will have to make the shield explode before they can get away. Another fact I’m going to show you in a moment is that you’re supposed to harass them and not getting harassed yourself. This means not shielding yourself, run in and take a lot of damage to make the shield exlode in order to harass. No no! You will only end up taking extra damage thus getting just as much harassed yourself as your own shield did to them.
Using the shield as a defense
As simple as it sounds, the main purpose of the shield is its protection. Why else would it be the Aphotic Shield. Though you mostly use it to harass during the early minutes of the game, you will use it to protect you and your allies later, especially in pushes. Try to shield the heroes who are being focused or whom you know will be focused in a moment. Of course it’s all okay to protect yourself from dieing if you’re being targeted but in general you don’t want to waste the shield on yourself as you have your ultimate to save you nearly all the time.
Using the shield as a heal
This technique only works on yourself because it needs to be combined with Borrowed Time. As I mentioned earlier, if you have activate your Aphotic Shield and Borrowed Time at the same time, the amount of damage taken during the time will be converted to health. This is a very smart technique to use if you need to heal yourself, especially if you’ve taken damage and there’re no enemies around so it means you can “waste” your ultimate for this.
This technique can also be used in live combat, especially against strong abilities like Echo Slam (Earth Shaker). However, you ought to be very careful not just throwing your ultimate in the trash for when you really need it. Also, if you’re running into towers to heal yourself like in the example above, you should just run in so the tower will barely shoot on you (1-3 shots are enough) and then run straight out again. Taking as much or more damage than you heal will result in a completely wasted Borrowed Time which might eventually have saved you a few seconds later if you suddenly get ganked.
Heroes to watch out for
Axe

Axe’s Culling Blade will cut through your ultimate and kill you if you’re below the health limit. Nuff said.
Lina and Lion

A very well known way to counter Abaddon is using either Lina or Lion. Their ultimates, Laguna Blade and Finger of Death, will kill you instantly before your ultimate even has a chance to auto-activate. Normally it activates when you go below 400 health. Lina’s and Lion’s ultimates damage almost 1000 at level 3 (or level 4 with Aghanim’s Scepter). You do the math.
Anti-pushers

Some heroes are excellent at stopping pushes. They’re like a huge, solid block between your team and their base. If you can’t get through them it will be very hard to push and eventually get very hard for you to do well later in the game. Some well known anti pushers are Sand King (Epicenter), Earthshaker (Echo Slam), Tidehunter (Ravage) and Silencer (Global Silence). However, heroes with much aoe like Tormented Soul, Twin Head Dragon and Tiny can also be effecient push stoppers and may be hard to work against when they clear your waves as fast as you clear their’s.
Abaddon’s best friends
Queen of Pain

Abaddon does very well laned with Queen of Pain. Queen of Pain often puts herself in danger when she blinks in to use her Scream of Pain. However, when she’s shielded she can be a huge pain in your enemies’ asses. Aphotic Shield benefits Akasha very well and allows for great lane domination.
Pushers

Basically a support Abaddon is a very much all-around hero and pretty much all heroes benefit from him, especially during the early- and the middle game. However, Abaddon does best when he is included in a pusher lineup which goal is to end the game around the 30th-40th minute. All heroes who help in pushes a lot like Twin Head Dragon, Krobelus, Beastmaster, Rhasta, Treant Protector, Lina and in fact just about all heroes with aoe spells that help clear creeps and kill multiple heroes go very good with Abaddon.

dazzle facts

Dazzle - Shadow Priest
Range: 500 | Move Speed: 305
Primary: INT
Str: 16 + 1.85 | Agi: 21 + 1.7 | Int: 27 + 3.4
Damage: 41 - 59 | HP: 454 | Mana: 351
HP Regen: 0.73 | Mana Regen: 1.09
Attack Speed: 0.71 | Armor: 2
Little is known to the Shadowtooth Clan, likely because this group of shadowy trolls never unveil the secrets of their mystifying sacrament. Nevertheless, the Loa they worship is much more powerful than most elementals, thus their favors must be kept in confidentiality. In return, these Primal Gods granted these trolls the power over paralyzing toxins, life-bending voodoo, and even endowment of life beyond the grave. A living eternity of death and misery, Dazzle now marches within the ranks of the undead, announcing the apocalypse of the Scourge that may lead them to much anticipated ascendancy.
Poison Touch Poison Touch (T)
A poisonous magic is placed on an enemy unit causing it to move slowly becoming paralyzed. The longer the poison takes to set in, the slower the unit will become. After the poison sets in, it takes physical damage per second for 7 seconds. Target moves slower per level.
Level 1 - 8 damage. Takes 1 second to set in.
Level 2 - 16 damage. Takes 2 seconds to set in.
Level 3 - 24 damage. Takes 3 seconds to set in.
Level 4 - 32 damage. Takes 3 seconds to set in.
• Damage type: physical
• At level 1 slows target by 33% for 1 second.
• At level 2 slows target by 33% for 1 second and then 66% for another second.
• At levels 3 and 4 slows target by 33% for 1 second, 66% for another second and then completly disables target for 1 second.
• This skill has a ministun that interrupts channeling skills.
• Casting range: 600
Mana Cost: 100/115/130/145
Cooldown: 15/13/11/9 seconds
Shallow Grave Shallow Grave (G)
Shallow Grave prevents any damage from killing the targeted hero for 5 seconds.
Level 1 - 400 Casting range.
Level 2 - 600 Casting range.
Level 3 - 800 Casting range.
Level 4 - 1000 Casting range.
• Targeted hero's hp won't go lower than 1 for spell duration.
• Shallow Grave will not prevent Axe's Culling Blade ability from killing a hero.
• If the Goblin Techies use Suicide Squad, Attack! while under the effect of Shallow Grave, they will still die.
Mana Cost: 140/130/120/110
Cooldown: 60/45/30/15
Shadow Wave Shadow Wave (D)
Sends forth a Shadow Wave to heal a few units. Healed units also damage a small area around them for the same amount.
Level 1 - Dissipates 80 damage, 3 targets.
Level 2 - Dissipates 100 damage, 3 targets.
Level 3 - Dissipates 120 damage, 4 targets.
Level 4 - Dissipates 140 damage, 5 targets.
• Damage type: physical
• Allied heroes are primary target for heal.
• 500 Bounce AoE between units
• 170 Damage AoE around the healed unit
Mana Cost: 80/90/100/110
Cooldown: 12/10/8/6
Weave Weave (W)
A powerful shadow magic used to increase or decrease defenses over time. Changes armor by 1 every second. Affects allied and enemy heroes in a 600 AOE.
Level 1 - Lasts 12 (18*) seconds.
Level 2 - Lasts 18 (24*) seconds.
Level 3 - Lasts 24 (30*) seconds.
Mana Cost: 100
Cooldown: 40
• Places buffs on heroes, so entering or leaving the initial area after the cast won't have any effect.
• Unobstructed sight (800 range day and night) is provided for a short time.
• Casting range: 2000
• Area of Effect: 600 (800*)
• Can be improved by Aghanim's Scepter (* shows the improved values).

dark seer hero guide


Ish'kafel

Introduction
Darkseer is one of the few heroes whom I predict will enter the competitive scene. The recent buffs he received is simply shocking. Vacuum has been improved tremendously. No more allies going wtf happened. Range improved as well. Shell is now stackable. Simply amazing.

In this guide, I will run you through a basic build for Darkseer. He is no longer the passive Int supporter who hides behind in teambattles. In many ways, you will see his playstyle similar to Axe. He jungles as good as Axe, if not better. He will rush in head-on like a man, just like Axe. Dual-Shells is his counter helix. Vacuum is his Berserker's Call. Like Axe, Hood and Vanguard shall be his Core.

In all honesty, my true motivation in writing this guide is hate and disappointment. Disappointed due to the fact nobody ever plays Darkseer and hate it whenever he is played, he is played wrongly. So yes, here I am writing this guide to create awareness. In the replay section, I have provided some 20+ replays for you to choose from. That is so unlike the usual "Replays Coming Soon" you often see, yeah? I can easily say, to date, he is the most fun and easiest hero to stomp with.


-----------

Skills
For full details of the skill, go here: Ish'kafel DotA Hero - DotA Allstars Official Websites
There may be missing information, but that will be included under the comments for each skills below.

Vacuum

At level 4 --
Mana Cost: 190
Cooldown: 16
Range: 800
AoE: 600
Dmg: 240

Vacuum, when used correctly can both destroy enemies' positioning and improves allies positioning. It is a great setup skill for AoE ultimates like Epicenter, Chain Frost, Echo Slam and such. You can pull them closer to your for your allies to land their AoE nukes, or throw them back to help your fleeing allies. A standard procedure will be to pull them towards you and let your dual-shell soften them up while allies go in for the kill.

Additional information:
~ Destroys trees within 200AoE from the centre
~ Can pull across Ridges and Cliffs
~ Pulls enemy in fog as well

Ion Shell
At level 4 --
Mana Cost: 120
Cooldown: 7
Duration: 15
AoE: 250
Dmg: 75/sec

Ion Shell at level 1 can be devastating since it can stack now. Cast one before going in for the gank. Wait till the cooldown timer is about to expire and then run in to the enemy. Cast a new one once cooldown is over. For a duration of 7-8 secs, you will have a dual-shell. At level 1, that is equivalent to 60dmg/sec. At level 4, that is 150dmg/sec. Try not to land a hit on the hero or you might lose him. Just follow by his side to ensure a kill.

Additional Information:
~ Stacks. A dual-shell will result in a brighter ion shell animation.
~ AoE is approximately that of Juggernaut's Bladefury.


Surge
Level 1: Grants Max. Speed for 3secs, 20 mana
Level 4: Grants Max. Speed for 7.5secs, 50 mana

Nice skill for chasing. One level of it is needed, to buff your allies with a stun or slow during a chase (eg. VS or Lich). At level 1 it cost a mere 20 mana. Helps you to get from camp to camp faster as well!

Wall of Replica

Level 1: 15secs, 200mana
Level 2: 30secs, 300mana
Level 3: 45secs, 400mana

Quite mana costly. At level 1 it lasts only for a measly 15 secs. Many would recommend to get it at level 10 and 11 but for me, if there isn't a need to level it, you can delay it till 14/15/16. Its primary use it to create confusion. At times, it works as a decoy as well but that rarely happens. Works great during a base push if done right.

Additional Information:
~ The images have the same color as your hero. Enemies can visually identify your images but that's quite hard in the midst of a teambattle.
~ Wall grants vision! Around 1000 range. Therefore, if you cast at the slope in front of the base tower, you will be able to see uphill.


----------

Skill Build

1. Ion Shell
2. Surge
3. Ion Shell
4. Vacuum
5. Ion Shell
6. Vacuum
7. Vacuum
8. Vacuum
9. Ion Shell
10. Surge
11. Surge
12. Surge
13. Wall
14. Wall
15. Stats
16. Wall

Basically, you will alternate between Ion Shell and Vacuum till they are maxed, with one point taken in Surge at level 2. Note that Vacuum will be maxed first. The larger AoE is more helpful than the extra damage for Ion Shell.

Wall is delayed till the point where it is needed. That is during the pushing phase. It usually occurs around the 20th min onwards. Focus in maxing your Surge in the meantime.

----------------

Gameplay


1. Game Start!

Get:

In most games, you will start off jungling.
1 stout is needed. The rest of the cash can be spent on tangoes/flasks/clarity potions, in whatever combination you like. If you are getting branches, Magic wand might prove useful since you can use the branches to upgrade it.

The Alternative Playstyle (Laning)
Indeed, DarkSeer can lane instead of jungle. He works well with most heroes which starts off with some kind of disable or slow, like Veno, CM, SK, Lion etc. You can aim for a first blood as well (just remember to double shell). Jungling is encouraged however, but if your jungle has been warded (ie no creep spawns), you might have to resort to laning.

If you are new to Jungling, proceed to read this guide: Creep Pulls and Jungling

Tips for Jungling
1. One shell, one camp. Do not waste mana with dual-shell.
2. Level 1 shell can kill most camps. Put Ogre camps on hold when you are level 1. You need 2x shells to kill them thoroughly. Avoid Big camps.
2. Level 2 shell can kill most Big Camps.
3. Avoid Furbolg camps. They deal too much damage. Leave them as your last camp before you make your way for a fountain trip.
4. Golems are immune to magic. If they spawn in the pullable camp, pull with creeps. If they spawn in the non-pullable camp for scourge, ignore them totally. The Sentinel's camp can be cleared if you do a double pull. If you want that is.
5. As stated in the Book of Jungling: Kill the creeps by the 42nd seconds. Or they will not respawn.
6. If it goes beyond 42 secs, you can attempt to draw them out of the spawn region (shown below) and kill them, to ensure a fresh new spawn arrives.
7. Additionally, if you are passing by a camp around the 50th sec, attempt to stack it. The magic number is 53rd secs.
8. Double/Triple pulls helps between level 1-3. Beyond that, don't bother.


A general walkthrough:
Scourge ~
i) Camp near the small camp (gnolls/kobolds/banshee/etc) and kill them with shell when they spawn at 0:30.
ii) Immediately once they are dead (around 0:45) head to the pullable medium camp and stack the camp by pulling upwards, between 0:51-055.
iii) Wait and pull again at 1:12 with your lane creeps. At this point, your top lane will be deprived of creeps, so beware of enemy heroes coming in take you out in the jungle. Always prepare yourself with 1x shell, and dual-shell if you think you can take out the enemy hero. You teammate at top lane will have to play smart by luring the enemy creeps away from the tower of course.
iv) After killing 1x small and 2x med camp, you will be or near to lvl 3. You can gank the guys on the lane if you want.
v) Otherwise, go back and farm the small camp, and the medium camp to the bottom. If timer is nearing x:50, attempt to stack it.

Sentinel ~
i) Again, head to the small camp and wait. You may scout for runes in the meantime. At 0:30, quickly clear the small camp. You must distribute your attacks evenly so all of them die at the same time (ie you want to kill asap). Timing is critical here, cos once they are dead, you need to run to the medium camp to stack it, using the tango abuse.
ii) If you manage to eat the tree by 0:55, you are still in time to stack the medium camp. Now wait at the bottom to pull them into lane at 1:16. Use shell to clear them faster. If you still have some creeps left, you may want to pull them to the next medium camp above through the small passage you just made. The timing to pull; when you have a centaur/ogre/golem with about half hp. When the creeps come chasing you, you should right click them so your allied creeps will change targets.
iii) At level 3, you shouldn't have much problem anymore.


Note: Getting to level 3 fast is important. Firstly, it allows you to take out larger camps easier. Secondly, with surge, you can pull off a better gank.
So don't screw up!

Qn: What if the medium camp is warded?
You'll be left with 1x small camp, and possibly the other medium camp. You can still jungle, just a little slower.

Your main goal while Jungling is to gain enough money (1100 gold) to purchase your boots and bottle so that you can transit to ganking phase. It takes around 5-7min to get that amount. In between jungling, if there opportunity for a gank at the side lanes, go ahead. Earn that extra gold.

Spawn Regions Layout:
The latest updated one so far. You can view the enlarged version as well. It is going to be hard to memorize the exact size of each region so you have to go by prominent markers. For example, the Sentinel's small camp has a boundary just before the hill to the right. For the Scourge's medium pullable camp, the top boundary is marked by the small bush. etc etc


----------------

2. Ganking Phase

With Boots and Bottle, wreak havoc on the lanes. Aim for those with heroes pushing far away from their towers. Remember to prepare a shell first and wait for cooldown to be almost over. Then head in for the gank, and cast the other shell for double damage. Surge to chase when you lose them. Vacuum if they try to TP out.

Bear in mind there are several goals you want to achieve through ganking:
1) To take down Towers ~ Every gank has a purpose. Killing heroes so you have an easier time taking down a tower is one of them. Darkseer can backlane as great as Axe, if not better. Shell yourself and kill the creeps behind enemy tower while your allies push down the towers.
2) Seize control of Runes ~ Search for runes everytime you had a successful gank. Besides Gold & XP, runes are your rewards as well.
3) Relieve pressure from your Carries ~ Sometimes you have carries like Spectre, PA, TB etc who can do nothing else except to farm during early game. Gank their lanes if they need help. Your offense is their defence during early game.
4) Control their Jungle ~ When lanes are impossible to farm due to constant ganks, some players might choose to hide in the forest. If possible, place wards as well. Gank them hard and steal their neutrals.


Ganking Tips

i. To prevent being juked (non-fog type like making a sudden 180-turn) while chasing, you can set your hero to follow with the move command (button 'm'). This is almost the same as right-clicking the hero, except that you hero will not attempt to attack.
ii. You can tower dive if creeps are tanking the tower hits. Remember not to click-attack the enemy or you will draw the tower aggro. Let your Ion Shell do the work.
iii. If you see a hero fleeing to the side shops, prepare to vacuum the area. They are most likely trying to TP home.
iv. When entering enemy forest, prepare a shell first. If you clash with an enemy hero, you get to dual-shell at the next moment. Do clear some neutrals with the existing shell if you can as well.
v. When they try to juke you, use vacuum and destroy the trees
vi. Surge is very useful for fleeing after a gank. Counter-ganks are quite common, so beware.
vii. Whenever you are not ganking, hide in the forest and farm. This is to keep the fear level high since they can't see you on the map.
viiii. Surge Orb-walkers, stunners, slowers, disablers during chasing phase.
x. Focus on ganking the lane where your allied carry is present. To help him farm easier. And don't shell away his creeps! Search the river for runes or gank elsewhere instead.
***xi. When you are going to TP-defend a tower, cast an initial shell on yourself first, wait 3-4 secs then start TP
ing. Once teleported, you can immediately cast another shell and start killing!

Items:


Items you should acquire is in the order above. After Boots + bottles, finish up a vanguard. It is highly useful for tanking nukes, creeps and towers. Play him like Axe, as aggressive as you can. Next is a Void stone. DS has a natural high Int, so he certainly can abuse the bonus from it. Generally, you will be getting hood as well to combat nukes. Always, get the planeswalker cloak first (400gold) before the rings + helm since your aim is to get more magic resistance. Phase boots is usually bought after vanguard has been built, and after you got a planewalkers cloak. Hood can be delayed a little for you to complete phase boots.
Remember to stock up on TP scrolls as well.

Note: I am assuming that your games will have high amounts of nukers and aoe on the enemy team. If you are faced with a purely dps team, you can choose to forego Hood for some other items.


The "Poor Man's Build"


For whatever reason, your early game didn't really work out well. Everytime you gank, you get counter-ganked. You can't make out money out of ganking. Then you have to resort to cheap items to tide you during early game. Boots and bottle (quite likely you already have it before you got screwed up) already gotten. You can delay Vanguard (since saving 1100 for Vit. booster might be a problem) and build a couple of bracers instead, like 2-3. Most likely the cause of failed ganks is from heavy nukers on the item team. If that is so, get a planeswalker cloak (just the cloak, $400 for 15% res. is quite a bargain).
The rest depends on your game. You could go complete your hood and/or vanguard or head direct for Shivas or whatever your team needs (like Wards/dust etc)


Magic stick can work well in higher level games. I'm not saying that the item sucks in low-level games but due to the differences in playstyle when you compare between both games, you will begin to understand why.
In higher-level games, early-games are packed with lots of ganking with much emphasis on nukes and spells. This is where your main source for charges will come from. Compared to lower-level/pub-games, early game are mostly passive games with people not leaving their lanes.

--------------

3. Pushing Phase


Items:
or
-- Shiva is the item for DarkSeer. Since you are playing him as a tanker, armor will come in handy. More importantly, it has great synergy with vacuum. Vacuum --> Shiva and you have a bunch of sitting ducks. The extra +Int helps your mana pool and regen as well. This is the preferred item if your team consist of mainly AoE users.
-- Guinsoo is the other choice. It acts as a hard disable especially against a team with a strong/troublesome carry. Guinsoo is superior to Shiva when it comes to mana regeneration (you will never run out of mana!). Afterall, you have a voidstone already bought. For me, I have preference for guinsoo.


-- Heart is a very powerful item when coupled with Hood. Grants him immense survivability. With guinsoo, you neither need to heal your mana nor hp. Just keep pushing! (no joke, seriously powerful item on him)
-- Refresher is nice to have once you have gotten your Shiva or Guinsoo. By then, you should have ample mana to double wall but I considered this rather overkill. You don't really need 2 walls to get the job done... but pubs love it. If I don't list this as a possible item, I will receive low ratings.
-- Pipe for AoE shield. Quite a nice upgrade if you have Hood. In teamfights with massive AoE nukes, this item is a must have.
-- Darkseer don't really need BoT to fulfill his role but if your team lacks a strong pusher, BoT will be needed to pressure the other lanes. Alternative for phase boots.


There is no specific timing when the pushing phase will start. But you will feel it coming when you see heroes, on either team, starts to bunch up. Usually, if you keep the pressure on ganking, eventually they will start to bunch up to avoid being picked off alone. It is then time for you to push as a team (or gank as a team). At this point in time, Vacuum will be your biggest asset. It is you who will decide how the teamfight will turn out.

Synergies/Combos with Vacuum:
Sandking ~ you might want to wait for him to channel and blink in and then vacuum.
Kunkka ~ wait for his boat to appear, then vacuum.
Tauren Chief ~ wait for his ultimate to appear, then vacuum them in.
Earthshaker ~ Cast a wall and vacuum them in. ES will blink in to Echo Slam. Make sure ES is ready though.
Shadow Friend ~ Vacuum towards him as he raises his hands into the air.
Lich ~ Take timing from his Chain frost. Vacuum the heroes together.
Witch Doc ~ Vacuum them in so Doc can cask them, maledict and place his deathward.
Axe ~ Keep popping Ion Shell on him and try to Vacuum the enemies together as he attempts to berserker's call them.

Much of the combos are very obvious. Be sure to tell your allies what your plan is. In most cases, you are the one in control of the combo, the other guy is the initiator (eg you take que from Kunkka's boat, SF from his ulti, etc). So the burden is on you to pull it off correctly.


Pushing with Wall.
Wall creates major confusion during pushes and it takes a while for opponents to correctly identify the images from the real (from their color). There is a tendency that they will retreat to the back slightly to buy some time assessing the situation. Push the images towards them, but dont clump them to attack a single hero, it will be obvious. This will push them back even further, giving you some time to take down the tower/base. Images are worth nothing more than a distraction so don't count on them so much for dealing damage.

Generally, you will want to place a wall immediately after you vacuum. Chances are they will get stuck being surrounded by images. During base pushes, you might want to form the wall before you charge in. Wall grants vision, 1000AoE to be exact. If you cast it on high ground, you will be able to have vision of their base.


---------
Top Ways Darkseer being played wrongly:

1. The "Battlefury" Darkseerr ~ Typical pub mentality. Battlefury on every hero. The tendency to build one arises when they player starts building a perseverance. DS already has shell to farm with, he doesn't need the cleave. Leave the item for better users like PA or Jugg.
2. The "Radiance" Darkseer ~ Less bad compared to Battlefury but some people insist to get it as a 1st core item. You have Ion shell which is 4x as powerful. Also, the extra 60dmg will come to no use since you have low attack speed.
3. The "Vacuumless" Darkseer ~ They exist! These guys max up surge and Ion shell first, only to max Vacuum at level 9 onwards. If anything, Vacuum is the first skill that needs to be maxed.
4. The "Mr. Combo" Darkseer ~ These players are fascinated with Darkseer's ability to combo-up with other heroes. They will bug you to no end if you are Bounty Hunter. Hear them preach on how awesome windwalk-shell combo is. But remember not to toss for the last hit, or they will get angry at you.
In the end, it doesn't really matter. Darkseer can do the same job. Alone.
5. The "Farmer" Darkseer ~ Amazed by his jungling ability, he will make his grand appearance 30mins into the game with Tier-4 items. Granted his team managed to hold the fort with 4v5.


-----------------
Replays:
Sorry there is no parser. The old D-A parser broke down .

Replay 1: Darkseer 30-5 v1.23
Download here: replay_download
This game starts off with some jungling and ganking of side lanes. I kept the ganking pressure high throughout the game, and at times it feels like me 1v5'ing the other team. After the usual vanguard+hood, I opt for Guinsoo instead of Shiva. Guinsoo grants massive mana regen (200%) and it helps alot in long drawn out battles. After which I went for heart and saw the enemy team complaining how "hard" I was...Game ended after 1hr with a 30-5 Darkseer.
(Game could have ended earlier but our techies is quite a lol-player. He was level 3 at 20mins...)

Replay 2: Darkseer 19-2 v1.23
Download here: replay_download
I didn't get the chance to jungle cos we had 1 ally short. So I took the solo top lane for myself. Trying to kill potm /w leap is a problem, so you have to wait for him to make mistakes before attempting to strike. I had OD in this game. Essence aura is a powerful combination with DS since he can get free mana by repeatedly casting his surge (50mana cost). So instead of Shiva/Guinsoo, I went straight for heart.

Replay 3: DarkSeer v1.23
Download here: replay_download
A game with friends, versus friends. One of my teammate dropped but we still pulled it off with a win. Nice fights all-round. Item build wise, it's a little different. I was still in the midst of testing this hero. It still had vanguard and hood however. I opt for Refresher in this game though, after Shiva has been built.

Replay 3: DS ppx+bouncy+furryfish (v.1.22)
Download here: replay_download
This is a an old Darkseer game, from v1.22. So you need to do a version swap if you want to watch this. If you want to get an idea how the old Darkseer looks like, watch this. Basically I got caught up in a game with papaxiong (Kingsurf), Bouncy (Zenith) and furryfish (some girls team, can't remember the name). It is a pub-game and well.. there's some leavers in my team. But quite a fun one though.

------------
Competitive Replays:
Darkseer has yet to make his way fully into the competitive scene, so there isn't much replays floating around. I'll show you 2 replays, one good one bad. All I can say is: the Chinese (China teams) are way ahead in recognizing Darkseer as a competitive hero.

Replay 1:TeG vs Ravens(v.1.23)
Download here: TeG vs Ravens download
DS went to solo mid against Morph since jungle is usually warded. But it would be better to dual-lane at a side lane near your jungle for easier ganking. Surprisingly, the DS didn't get Magic stick. Quite a bad game, his team got rolled.


Replay 2:Ks.cn vs ddc(v.1.20, you need a replay viewer switcher, get it here:
http://www.playdota.com/forums/917/r...lays-wc1-23-a/ )
Download here: Ks.cn vs ddc download
This one is better. China team vs China team. The DS soloes mid as well against OD (quite weird pick). He was able to farm pretty well, built his hood+vang, bought magic wand, phase boots+bottle. He was pretty well played overall.

Here are some v1.24 Competitive Replays from Asian Dota Championship (ADC):

Game 1: mski vs Mcity v1.24
Game 2: mski vs Mcity game 3 v1.24
Game 3:Cybertime vs Mcity v1.24
I can't remember the details of the games. 2 out of 3 of the games had DS's team winning.


------------
Additional Replays:
Over the past few weeks, I've been playing tons of games with this hero over the past weeks. Really loved the hero. So I've gathered some 20+ replays of him. These are not clan war games or some super high level ones. This is not to brag as the point I want to drive here, is that the Darkseer you see today is way different from the past versions. He is insanely easy to stomp with now. The 20 replays are ample proof that anyone, noob or pro, will be able to own with Darkseer

Download File:
Darkseer games.rar
(filesize: ~13mb, total 22 replays)

SIR CLAN FAN CLUB © 2009. Entropia Guide Sponsored by: The Online Helper